Tuesday, December 17, 2013

Fix Content Type Publishing : The compatibility level 14 of the content type hub site is different from the compatibility level of this site 15.

After we migrate from SharePoint 2010 environment to a SharePoint 2013 environment, we need to follow few post upgrade steps.

Let’s assume we had a content type hub site collection where other sites subscribe to consume content types. You can learn more on Content Types and Content Type publishing through a content type hub by referring this article

After we migrate, our content type hub site collection is still in the 14 compatibility mode (SharePoint 2010 mode). Since it in the old compatibility level, newly created site collections (SharePoint 2013 mode) can’t subscribe to the content type hub.

To fix the issue we need to either create a new Content Type Hub site collection or upgrade the existing site collection. Following are the steps required to upgrade/create content type hub site collection

1. Upgrade the content type hub site collection

You can either do it manually or by PowerShell statements

  1. Upgrade-SPSite "http://sp13/sites/hub" -VersionUpgrade -QueueOnly

2. Check/ Change the content type hub Url.

This step is not mandatory. But let’s assume we need to keep the existing content type hub site collection in 14 mode, and need to create a new site collection for the new environment. In that case we will skip the 1st step.

  • Create new site collection
  • Create content types as available in the old content type hub site collection
  • Enable the “Content Type Syndication Hub” site collection feature
  • Use following PowerShell statement to make the new site collection as the
  1. $newContentHub = "http://sp13/sites/hub15"
  2. $mms = Get-SPServiceApplication -Name "Managed Metadata Service"
  3. Set-SPMetadataServiceApplication -Identity $mms -HubURI $newContentHub

3. Publish/ Republish Content Type Hub.

Since we changed the content type hub site collection, we need to publish or republish content types those need to be published to other sites.

image

4. Run required timer jobs

We need to run two timer jobs to make the changes reflect in subscribed sites. In central administration go to Monitoring > Review Job Definitions to select timer jobs.

  • Select the timer job “Content Type Hub” and click Run Now
  • Select the timer job “Content Type Subscriber” for the web application and cluck Run Now. If you have multiple web applications those are subscribed to content type hub, you have to run the Content Type Subscriber jobs for all of them

Monday, December 2, 2013

Reusing SharePoint custom service application proxy groups

When we create a new web application, we need to associate it with a service application proxy group. Either we can associate it with default proxy group or a custom group
image
Let’s say we need to create 2 web applications those require only Managed Metadata Service as a service application. In that case we need to go for a custom proxy group.
If we create those web applications using custom proxy group we can see 2 separate “Custom” proxy groups created.
Although they contain same service application proxies, We can’t reuse the groups by default. In that case if we need to associate a new service application proxy, we need to add it to each and every “Custom” group.
image
Is there any way to create named proxy groups where we can reuse for our web applications ?
We can use PowerShell cmdlets to create named proxy groups and add member service application proxies. Let’s say we create a proxy group named “Contoso” and we need only “Managed Metadata Service” for that group. Then we’ll need to provide following PowerShell commands.
New-SPServiceApplicationProxyGroup "Contoso"
$mmsproxy = Get-SPServiceApplicationProxy | where { $_.Name -eq “Managed Metadata Service” }
Add-SPServiceApplicationProxyGroupMember "Contoso" -Member $mmsproxy
Then we can see our group listed when we create a new web application (or changing the Service Application Association setting)
image
We can associate our existing sites using the Service Application Association section.

image
Now it looks very organized. If we need to associate new proxies we can add/remove them from our named proxy group which will be reflected for all associated web applications.

Tuesday, November 19, 2013

Add content and web parts to wiki page programmatically

When we provision sites and pages programmatically we may need to add or modify content to wiki pages as well. Although it is not a good practice to add web parts to the wiki field, some times it is the only option we have.

Following is a code sample where we can add content to a wiki page. We can use a feature receiver to do the task

  1. public override void FeatureActivated(SPFeatureReceiverProperties properties)
  2. {
  3.     var web = properties.Feature.Parent as SPWeb;
  4.     web.AllowUnsafeUpdates = true;
  5.  
  6.     //Add Shared Documents webpart
  7.     var sharedDocuments = web.Lists.TryGetList("Shared Documents");
  8.     var sharedDocWP = new XsltListViewWebPart();
  9.     sharedDocWP.ListId = sharedDocuments.ID;
  10.     sharedDocWP.Title = "Shared Documents";
  11.     sharedDocWP.ChromeType = PartChromeType.TitleOnly;
  12.     sharedDocWP.ID = Guid.NewGuid().ToString();
  13.     var homePage = web.GetFile("SitePages/Home1.aspx");
  14.  
  15.     // Replace the current wiki page content
  16.     GenerateNewWikiContent(homePage, sharedDocWP);
  17.     web.Update();
  18. }

Following is the method to add html content and serialized web part to the page. We can use several StringBuilders to create the content and finally assign to the WikiField property.

  1. public static void GenerateNewWikiContent(SPFile wikiFile, WebPart webpart)
  2. {
  3.     var stringBuilder = new StringBuilder("");
  4.     var pageColumn1 = new StringBuilder("");
  5.     var pageColumn2 = new StringBuilder("");
  6.     stringBuilder.Append("<table id='layoutsTable' style='width: 100%'><tbody><tr style='vertical-align:top'>");
  7.  
  8.     //Content for column 1
  9.     pageColumn1.Append("<td style='width: 66.6%'><div class='ms-rte-layoutszone-outer' style='width:100%'><div class='ms-rte-layoutszone-inner' style='min-height:60px;word-wrap:break-word'>");
  10.     pageColumn1.Append(" <h1 class='ms-rteElement-H1B'  style='margin-bottom: 0px;'><span><span>Welcome to your site!</span></span></h1>");
  11.     pageColumn1.Append("<p>Add a new image, change this welcome text or add new lists to this page by clicking the edit button above. You can click on Shared Documents to add files or on the calendar to create new team events. Use the links in the getting started section to share your site and customize its look.</p>");
  12.     pageColumn1.Append("<p/><br/>");
  13.  
  14.     //Deleting existing Wiki Content
  15.     wikiFile.Item[SPBuiltInFieldId.WikiField] = string.Empty;
  16.     wikiFile.Item.UpdateOverwriteVersion();
  17.  
  18.     using (var limitedWebPartManager = wikiFile.GetLimitedWebPartManager(PersonalizationScope.Shared))
  19.     {
  20.         var storageKey = Guid.NewGuid();
  21.         var strStorageKey = "g_" + storageKey.ToString().Replace('-', '_');
  22.  
  23.         webpart.ID = strStorageKey;
  24.         limitedWebPartManager.AddWebPart(webpart, "wpz", 0);
  25.         var webPart = string.Format(CultureInfo.InvariantCulture,
  26.                                     "<div class='ms-rtestate-read ms-rte-wpbox' contentEditable='false'><div class='ms-rtestate-read {0}' id='div_{0}'></div><div style='display:none' id='vid_{0}'/></div>",
  27.                                     new object[] { storageKey.ToString("D") });
  28.         pageColumn1.Append(webPart);
  29.         pageColumn1.Append("</div></div></td>");
  30.  
  31.         //Content for column 2
  32.         pageColumn2.Append(
  33.             "<td style='width: 33.3%'><div class='ms-rte-layoutszone-outer' style='width: 100%'><div class='ms-rte-layoutszone-inner' style='min-height: 60px; word-wrap: break-word'>");
  34.         pageColumn2.Append("<p class='ms-rteThemeForeColor-5-5' style='text-align:left;font-size:10pt;' >");
  35.         pageColumn2.Append(
  36.             "<img style='margin:5px;' alt='People collaborating' src='/_layouts/images/homepageSamplePhoto.jpg' />");
  37.         pageColumn2.Append("</p>");
  38.  
  39.         pageColumn2.Append("</div></div></td>");
  40.  
  41.         stringBuilder.Append(pageColumn1.ToString());
  42.         stringBuilder.Append(pageColumn2.ToString());
  43.         stringBuilder.Append("</tr></tbody></table><span id='layoutsData' style='display: none'>false,false,2</span>");
  44.         wikiFile.Item[SPBuiltInFieldId.WikiField] = stringBuilder.ToString();
  45.         wikiFile.Item.UpdateOverwriteVersion();
  46.         wikiFile.Item.Update();
  47.     }
  48. }

Following is the page output

image

Thursday, November 14, 2013

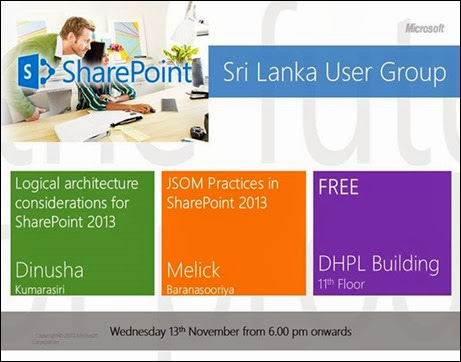
Presentation–Logical architecture considerations for SharePoint 2013

Recently I did a presentation at Sri Lanka SharePoint forum regarding how to design the logical architecture for new and existing SharePoint 2013 environments.

1450839_10151871096182530_689902513_n

There are some best practices influenced by SharePoint online regarding the logical architecture. We discussed how web applications, sites and other components are created in SharePoint online and how we can create a similar environment.

Monday, November 4, 2013

Encrypt values of a column - SQL Server

We can use T-SQL EncryptByKey method to encrypt data in a specific column and DecryptByKey method to decrypt that. In this post I’ll explain how to use those methods.
As the first task we will create a symmetric key and a certificate as below.
USE Staff;
GO

CREATE MASTER KEY ENCRYPTION BY PASSWORD = 'Passwordabcd';
GO
CREATE CERTIFICATE Prod_Cert WITH SUBJECT = 'Key Protection';
GO

CREATE SYMMETRIC KEY My_Key WITH
    KEY_SOURCE = 'This is the symmetric key',
    ALGORITHM = AES_256, 
    IDENTITY_VALUE = 'This is the symmetric key'
    ENCRYPTION BY CERTIFICATE Prod_Cert;
GO

-- Create a column in which to store the encrypted data.
ALTER TABLE dbo.Employee
ADD EncryptedAge varbinary(128); 
GO
After that we can insert/update data to the column we just created while encrypting the data.
USE Staff;
GO

OPEN SYMMETRIC KEY My_Key
   DECRYPTION BY CERTIFICATE Prod_Cert;

UPDATE dbo.Employee
SET EncryptedAge
    = EncryptByKey(Key_GUID('My_Key'), 'my new value');
GO
Values in the column are encrypted as below.

image
Use below query to decrypt the value
OPEN SYMMETRIC KEY My_Key
   DECRYPTION BY CERTIFICATE Prod_Cert;
GO

SELECT Name, EncryptedAge 
AS 'Encrypted Age',
CONVERT(varchar, DecryptByKey(EncryptedAge)) 
AS 'Decrypted Age'
FROM dbo.Employee;

GO
You can get the decrypted value as below

image

Monday, October 28, 2013

Upload files to libraries using SharePoint services

We can use copy.asmx SharePoint web service to upload files when we can’t use SharePoint object model.
It’s very simple. you need to do something like below.
   1: const string webUrl = "http://sp13:8080/sites/hr/";
   2: const string sourceUrl = @"C:\Copy\emp.doc";
   3: string[] destinationUrl = { @"http://sp13:8080/sites/hr/Documents/emp.doc";
   4: CopyService.CopyResult[] resultArray;
   5: byte[] fileContents;
   6:  
   7:  var copyService = new CopyService.Copy
   8:   {
   9:     Url = webUrl + "/_vti_bin/copy.asmx",
  10:     Credentials = System.Net.CredentialCache.DefaultCredentials
  11:   };
  12:  
  13:  
  14:  var filedInfo = new CopyService.FieldInformation
  15:   {
  16:     DisplayName = "Title",
  17:     Type = CopyService.FieldType.Text,
  18:     Value = "Test"
  19:   };
  20:  
  21: //add values to fields in the library using fieldInfoArray array
  22: CopyService.FieldInformation[] filedInfoArray = { filedInfo };
  23:  
  24: //upload file using a file stream
  25: using (var stream = new FileStream(sourceUrl, FileMode.Open, FileAccess.Read))
  26:  {
  27:    fileContents = new Byte[stream.Length];
  28:    var read = stream.Read(fileContents, 0, Convert.ToInt32(stream.Length));
  29:    stream.Close();
  30:   }
  31:  
  32: var copyResult = copyService.CopyIntoItems(sourceUrl, destinationUrl, filedInfoArray, fileContents, out resultArray);

Sunday, October 20, 2013

Disable offline synchronization for all libraries with specific template

Recently we got a requirement to disable offline synchronization for all Picture Libraries in a web application. Reason for the exclusion was that, those libraries contain large amount of pictures which take long time to download to the client.
We use following PowerShell script to disable offline synchronization for all Picture Libraries currently exist in the web application
   1: Start-SPAssignment -global
   2: $webs = Get-SPWebApplication "http://sp13" | Get-SPSite -Limit All | Get-SPWeb -Limit All | Foreach-Object { 
   3: Foreach ($list in $_.Lists | Where-Object { $_.BaseTemplate -eq "PictureLibrary"}){
   4:  $list.ExcludeFromOfflineClient=1; 
   5:  $list.Update()
   6:  }
   7: }
   8: Stop-SPAssignment –global
As a result, the synchronization process skips Picture Libraries

image

Monday, October 14, 2013

Configure SharePoint People Picker to include One-way trusted domains

If you have multiple one-way trusted domains in your SharePoint environment, you should explicitly configure people picker control. Otherwise users from those domains will not be searched.
To configure the people picker you need to follow these steps.

Configure encryption key
You need to type below command in each WFE servers
STSADM.exe -o setapppassword -password "key"
Configure people picker
Then you need to execute below command with privileged user for each domain. This command will configure people picker per web application and zone.
STSADM.exe -o setproperty -pn peoplepicker-searchadforests -pv "forest:sp.local;domain:apac.contoso.com,apac\user,*****;domain:emeia.contoso.com,emeia\user,*****" -url https://www.sp13
That’s all !. Now you can  search for users in one-way trusted domains in your people picker

Monday, October 7, 2013

Convert claims based login name in SharePoint

In SharePoint 2010 and 2013 we can have classic mode authentication as well as claims based authentication. In a classic mode scenario, if we get LoginName for a SPUser object it would result something like “Domain\LoginName”

But if the web application is configured with claims based authentication it will provide us something like “i:0#.w|Domain\LoginName”.

Let’s say we don’t need the prefix (e.g: i:0#.w ) and require only the valid login name portion (in this case Domain\LoginName). How do we get it ? Will something like below work ?
   1: var user = @"i:0#.w|dev\john";
   2: var encodedUser = user.Split('|')[1];
OK. it will work, but for this scenario only.

This is because that claims based environment is highly scalable where you can plug so many authentication providers. If you plug another authentication provider instead of windows authentication you may get different forms of encoded strings. Let’s assume you have federated authentication using email as login you would get something like below for LoginName
   1: i:05.t|Azure|myemail@gmail.com
You can see that string operations (e.g:split) we’ve used in above code will not work for this scenario. Furthermore there are so many other claim representations as well for other providers. You can get a complete list by referring this post from Wictor Wilen’s blog.

What is the recommended way to decode claims encoded string. We can get the help from “SPClaimProviderManager” class. Following code will decode claims string.
   1: private string GetLoggingName(string name)
   2: {
   3:     var manager = SPClaimProviderManager.Local;
   4:     if (manager != null){
   5:         return SPClaimProviderManager.IsEncodedClaim(name) ? manager.DecodeClaim(name).Value : name;
   6:     }
   7:     return name;
   8: }
It’s better to avoid string operations to decode/encode claims as we don’t know what providers will be plugged or unplugged in our claims environment future.

Sunday, September 15, 2013

Set SharePoint default compatibility range after migration

SharePoint 2013 supports a great level of backward compatibility, where it allows us to run sites either in 2010 or 2013 mode. You can get more information on SharePoint 2010 and 2013 modes by referring to this article.
This feature comes in very handy for a migrated environment which has following requirements.
  • Need to create new sites, but they should have SharePoint 2010 look and feel
  • Site collection administrators should not be able to upgrade there sites to SharePoint 2013 until they feel it's 100% ready to do so
You may think above requirements are absurd. Why do we migrate an entire environment, and still keep the older look and feel. But they have some valid points.
  • Users are not still ready for the new look and feel, and migrated environment should not cause any confusion for end users
  • End user, super user, site administrator training is not complete yet.
  • Policy where sites need to be upgraded gradually. (e.g.: home site upgraded first, and department site collections each week)
So how do we achieve the goal ?
We can modify the compatibility range web application property to arrive at a solution. We can use following Powershell commands to see current compatibility range
   1: $wa=Get-SPWebApplication "http://sp2013"
   2: $wa.CompatibilityRange

This provides us following information

image

The meaning of the above is that, if we create a site collection with default settings, the farm will create a site in SharePoint 2013 mode as the DefaultCompatibilityLevel is set to 15. Since the MinCompatibilityLevel is 14, it is possible to create sites with 2010 compatibility mode as well as 2013 mode with default settings (As shown in below image).

image

Apart from that, site administrators are notified that their SharePoint 2010 sites can be upgraded to SharePoint 2013 mode as the MaxCompatibilityLevel is set to 15.

image

Solution

We need to modify the compatibility range to suit our requirement. To do that we will execute following Powershell commands
   1: $wa=Get-SPWebApplication "http://sp2013"
   2: $range = New-Object Microsoft.SharePoint.SPCompatibilityRange(14,14)
   3: $wa.CompatibilityRange = $range
   4: $wa.Update()
   5: $wa.CompatibilityRange

image
The New-Object Microsoft.SharePoint.SPCompatibilityRange(14,14) instructs that both MinCompatibilityLevel and MaxCompatibilityLevel is set to 14 (SharePoint 2010 mode). So if we create new site collections, they will be in 2010 mode. (You can’t see the SharePoint 2013 option)

image

Furthermore site administrators are not notified about possible upgrade options.
If we need to revoke the setting later to allow SharePoint 2013 to be the default we need to execute following Powershell commands
   1: $wa=Get-SPWebApplication "http://sp2013"
   2: $range = New-Object Microsoft.SharePoint.SPCompatibilityRange(14,15)
   3: $wa.CompatibilityRange = $range
   4: $wa.Update()
   5: $wa.CompatibilityRange

In this scenario, MinCompatibilityLevel is set to 14 and MaxCompatibilityLevel is set to 15. The DefaultCompatibilityLevel is set to 15 which is as same as MaxCompatibilityLevel.

In a SharePoint migration scenario with strict policies and guidelines, CompatibilityRange property can be a lifesaver.

Friday, September 13, 2013

SharePoint 2010 mode in SharePoint 2013

If you’ve done a migration from SharePoint 2007 to SharePoint 2010, You may remember the visual upgrade features features of SharePoint 2010.

It was a cool feature. If the environment is still not ready for the drastically different SharePoint 2010 UI, They can still live with old SharePoint 2007 style UI.

But it had some drawbacks which makes it less usable. For an instance let’s assume we had web parts and some elements which we used in our SharePoint 2007 environment. Most of the time we get errors or they me not render properly in our new migrated environment.

SharePoint 2013 has improved a lot in the visual upgrade process and it provides us some additional benefits as well.

When we do a fresh installation, it’ll create both 14 and 15 folders in “Web Server Extensions” folder. (So we can say both 14 hive and 15 hive exists in SharePoint 2013 environment).

image

Why do we need both 14 and 15 hives in our SharePoint environment and what are the improvements in visual upgrade process ?

As far as I see, there are 2 main benefits

  • Since it has Features, Layouts and Assemblies related to SharePoint 2010 solutions(WebParts and other elements) in 14 hive solutions will run seamlessly in a migrated environment.
    • Apart from that when we deploy new SharePoint solutions (WSPs) we can target a specific compatibility level (SharePoint 2010 and 2013) as well by using the CompatibilityLevel Switch.
  • We can scope site collections or entire web applications to SharePoint 2010 mode. If it is scoped in that way newly created site(s) will contain SharePoint 2010 UI and features. Simply say we can create sites in SharePoint 2010 compatibility mode as well as SharePoint 2013 compatibility mode.

In a separate post I’ll show some additional benefits of SharePoint 2013 compatibility modes.

Tuesday, August 20, 2013

Unprovision duplicate service instances in SharePoint 2013

Recently when I checked one of our SharePoint farms (3 server farm with one WFE server, one Application server and one database server), I noticed that service application instances are not provisioned as we planned.
For an example the “SharePoint Server Search” service instance was running on both WFE and Application servers which should be enabled only in the Application server.
So how can we stop that service instance in the WFE server ? can we do it from the central administration itself ?
Unfortunately we can’t. If we try that way we get the following error

image
Instead of using the central administration, we can use PowerShell. We need to get the correct guid of the service application instance.(in this case we need to unprovision the search service instance of WFE server) . As I explained in this post we can get the id of relevant service application instance
   1: Get-SPServiceInstance | where {$_.Status -eq "online" -and $_.TypeName -eq "SharePoint Server Search" } | Sort TypeName | Format-Table TypeName,Id,Server
I got two results for above query as below.

image
To unprovision the SharePoint server search instance from WFE server, I execute the following command
   1: $sh = Get-SPServiceInstance -Identity "7fbdf7a3-c471-4cd7-ba26-4432236b3bd7"
   2: $sh.Unprovision()
That will disable the Search service instance from WFE server.